
Mutton Biryani Recipe
Ingredients
Mutton (with bones)** – 1 kg
Ginger garlic paste** – 4 tbsp
Turmeric powder** – 1/2 tsp
Red chilli powder** – 1 tsp (or to taste)
Kashmiri chilli powder** – 1 tsp (for color)
Roasted cumin powder** – 1 tsp
Coriander powder** – 2 tsp
Garam masala powder** – 1 tsp
Biryani masala powder** – 1 tbsp
Salt** – to taste
Lemon juice** – 3 tbsp
Green chillies** – 5-7, coarsely ground
Fresh coriander leaves** – A handful, finely chopped
Mint leaves** – A handful
Curd (yogurt)** – 1 cup (adjust if the curd is too sour)
Fried onions** – 3 (fried until golden)
Whole spices
Bay leaves – 2-3
Mace flower – 1
Green cardamoms – 5-6
Cloves – 5-6
Cinnamon stick – 2 inches
Ghee – 2 tbsp
For Rice
Basmati rice – 1 kg
Whole spices for water:
Mace flower – 1
Large cardamom – 2-3
Small cardamom – 5-6
Cloves – 5-6
Black peppercorns – 1 tsp
Shahjeera (caraway seeds) – 1 tsp Cinnamon – 2-inch piece
Star anise – 1 flower
Bay leaves** – 2-3
Kewra water** – 1 tsp (optional)
Oil** – 3 tbsp
Salt** – 3 tbsp (for boiling the rice)
Lemon juice** – 1/2
Green chillies** – 4-5 (whole)
Mint leaves** – A handful
Fresh coriander leaves** – A handful, finely chopped
For Garnishing
Fried onions – As required
Green coriander – Finely chopped
Mint leaves – As required
Ghee – 2 tbsp
Let’s Start Recipe
Today, we will prepare a very interesting, spicy, and delicious special Mutton Dum Biryani recipe. This biryani is easy to make and will surely impress your guests on festival. You can prepare this amazing recipe for festival, and it will be a favorite among everyone. Let’s start the recipe immediately!
Step 1: Marinating the Mutton
Take 1 kg of mutton with bones and add the following ingredients:
4 tbsp ginger garlic paste
1/2 tsp turmeric powder
1 tsp red chilli powder (adjust to taste)
* 1 tsp Kashmiri chilli powder for color
* 1 tsp roasted cumin powder
2 tsp coriander powder
* 1 tsp garam masala powder
* 1 tbsp biryani masala powder (any brand of your choice)
Salt (to taste)
3 tbsp lemon juice
5-7 green chillies, coarsely ground
A handful of fresh, finely chopped coriander
A handful of mint leaves
1 cup curd (adjust if the curd is too sour)
3 fried onions (fried until golden)
Also, add the following whole spices:
2-3 bay leaves
1 flower of mace
5-6 green cardamoms
5-6 cloves
A 2-inch piece of cinnamon stick
Add 2 tbsp of ghee and mix all the ingredients well. Massage the spices into the mutton thoroughly. For best results, marinate for 2-3 hours. If you’re short on time, marinate for at least 30 minutes.
Step 2: Cooking the Mutton
In a pressure cooker, heat 1/2 cup of oil (the same oil in which you fried the onions). You can substitute oil with ghee for richer flavor. Add the marinated mutton into the cooker. Stir well on high flame until the color of the mutton changes and the raw spices cook off. Optionally, add two medium-sized tomatoes (this is optional; you can make the biryani without tomatoes). Cook for 5-7 minutes.
The mutton will release water, but you will need to add about 1/2 cup of extra water for pressure cooking. Mix well and close the lid. Cook on high flame for 1 whistle, then lower the flame and cook for 10-15 minutes depending on the quality of the mutton.
Step 3: Reducing the Water
After 15 minutes, turn off the gas and let the pressure release naturally. Once opened, you will find the mutton cooked beautifully, but there will still be some water left. To reduce the water, cook on medium-high flame for 4-5 minutes, allowing the gravy to thicken.
Step 4: Preparing the Rice
While the mutton cooks, bring 3-4 liters of water to a boil in a large pot. Add the following whole spices to the water for flavor:
1 flower of mace
2-3 large cardamoms
5-6 small cardamoms
5-6 cloves
A 2-inch piece of cinnamon
A few black peppercorns
1 tsp Shahjeera (caraway seeds)
A star anise
Add 2-3 bay leaves, 1 tsp Kewra water (optional), and 2-3 tbsp oil. Add 3 tbsp of salt to the water, as the salt should be strong enough to season the rice. Also, add the juice of half a lemon for fluffy and white rice. Stir the ingredients well and let it boil for 2-3 minutes. After that, remove the whole spices from the water.
Step 5: Cooking the Basmati Rice
Once the whole spices are removed, add 1 kg of basmati rice (washed and soaked for 30 minutes). Bring the water to a boil again and cook the rice for 5-7 minutes until it is about 90% cooked. Once done, strain the rice to remove excess water.
Step 6: Assembling the Mutton Dum Biryani
In a large pan, add 1 tbsp of oil to prevent the biryani from sticking to the bottom. Begin by spreading one portion of the cooked rice evenly. Pour half of the mutton gravy over the rice and spread it evenly. Add some chopped coriander, mint leaves, and fried onions on top.
Then, layer the second portion of rice over the mutton gravy, covering it completely. Add a bit of orange-red food coloring mixed with kewra water to give the biryani a beautiful color. Spread the remaining mutton gravy on top of the second rice layer. Garnish with some more coriander, mint leaves, and fried onions.

Step 7: Final Layer and Steaming
Now, spread the final layer of rice over the mutton. Garnish with more fried onions, mint leaves, coriander, and green chillies. Add 2 tbsp of ghee for richness and moisture. To create steam, pour 1/4 cup of reserved water from the rice boiling process into the center of the biryani. Cover the biryani with a lid.
Step 8: Dum Cooking (Steaming)
Cook the biryani on high flame for 2 minutes, then lower the heat and cook for 12-15 minutes. After cooking, let it rest for 10 minutes before opening the lid. This ensures the biryani remains fluffy and aromatic.
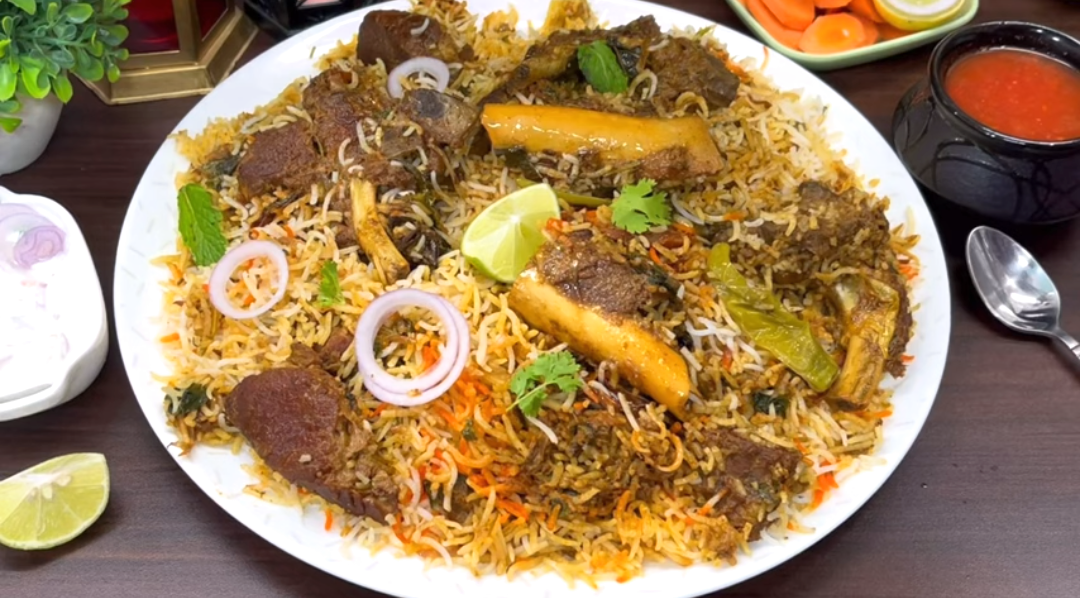
Step 9: Serving the Mutton Dum Biryani
Once the biryani is cooked, fluff the rice with a fork, carefully pulling from the sides to avoid crushing the layers. Serve the Mutton Dum Biryani hot with raita, kachumber, or your favorite side dish.
Tip
Our Mutton Dum Biryani is now ready! It is a flavorful, spicy, and incredibly aromatic dish perfect for your Any celebrations. This biryani will surely impress your guests. Try this recipe at home, and don’t forget to like and Comment to the Post.
Thank you…♥️